
Underground lawn irrigation and drainage systems may seem complex, but the principles by which they operate are quite simple, and understanding a little about the system will help you understand the problems that can occur. With rare exceptions, most homeowners find it possible to fix these issues on their own.
How Does Lawn Irrigation System Work?
In-ground turf irrigation and drainage system consist of several main components. In the typical system, a water supply pipe from the main water source first passes through a ground-level solenoid valve box, where it is divided into individual underground irrigation zones, each controlled by its own zone valve. The valves are controlled by an electronic controller through a pair of low voltage wires, the controller that sets the time and duration of each watering. Smaller houses may have only one irrigation sector, but most have two, three, or even more.

The valves themselves consist of a diaphragm that controls the flow of water, and the diaphragm is opened and closed based on signals received from the controller. The solenoid controls a spring-loaded metal piston that opens or closes the water port that passes through the valve. Valves come in many shapes and configurations, including models that incorporate an anti-siphon device. In other systems, the anti-siphon valve is a separate device that is installed in the water piping before reaching the valve box.
When a valve opens, water flows through several underground PVC pipes to feed the bouncing sprinklers and deliver water to the turf for as long as the controller tells the valve to remain open.
Problems with an irrigation and drainage system often become evident with several common symptoms:
- Individual sprinklers do not work
- Low water pressure in sprinklers
- Irrigation sectors do not turn on
- Leak around a solenoid valve
- Leak in the sprinkler furthest from the valve
Tools And Supplies You Need To Troubleshoot Your Irrigation System
- Multimeter Screwdrivers
- Shovel and hoe
Instructions
Troubleshooting lawn irrigation and drainage system involve careful observation of symptoms. This will usually direct you to the source of the problem and solutions for it.
Once the specific cause of the problem has been identified, find the manufacturer’s name on the drive and consult their website (or manual, if you still have one) for specific instructions on repairing or replacing the problem drive. General solutions are described here, but if you need more information to fix the system, consult our technicians!
Symptom: Individual Sprinklers Not Working
One of the most common problems with a lawn irrigation system is when sprinklers are damaged. This type of problem is easy to detect. Look for:
- Damage to sprinkler plastic housing and sprinkler heads that will not rise
- water that splashes uncontrollably or does not bounce.
- Sprinklers with completely broken heads. Damage to the sprinkler heads is very common if the heads are too high and run over by lawnmowers or cars.
Solutions To Sprinkler Head Problems Include:
- Clean the sprinkler head of any debris and reset its spray pattern
- Replace the sprinkler head with a new one
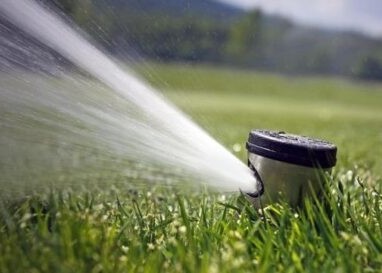
Symptom: Low Water Pressure
This problem manifests itself in sprinklers that barely spray water. Sometimes the heads don’t even appear. There are several possible causes and solutions:
A serious cause is when there is a leak in the water pipe somewhere along with one of the underground irrigation lines. These water line problems are usually located somewhere between the valves and the first sprinkler. You may find areas of soggy lawn where water is pooling or even rising. This is where you will need to dig and repair the waterline.
If no obvious leaks are apparent, the irrigation line may be compressed so that water passage is restricted. This can be caused by tree roots or because a vehicle has compressed the soil and compressed the pipe. The only option here is to systematically dig the lawn until you find the damaged pipe.
Another, the less common cause is bad sizing of the irrigation sector, where there are many sprinklers in a single sector. The solution to this problem is to sectorize your irrigation into more sectors.
Symptom: Sprinkler Sectors Do Not Turn On
When sprinkler zones don’t turn on, it’s usually a problem with the electrical signals going from the controller to the valve solenoids. More rarely, it is caused by a defective valve that needs to be rebuilt or replaced.
If Only A Single Zone Is Inactive
The problem may be with insufficient voltage for the terminals that feed the wires that lead to the problem sector. You can use a multimeter to test between the common terminal and the zone terminal – if the voltage is too low (they should be between 20 to 28 volts) you will need to replace the entire controller. The low voltage wires running from the controller to the zone valve solenoid may be damaged or disconnected. Check the wires and make sure they are intact.
The solenoid in the valve may be defective. In that case, you will need to replace the solenoid. With the controller in the OFF position, simply remove the solenoid wires and unscrew them from the valve. Screw-in a new solenoid and reconnect the wires. The valve itself may need to be rebuilt or replaced. In some cases, simply disassembling and cleaning the diaphragm will solve the problem. In other cases, replacing the diaphragm and spring will be the solution. In severe cases, replacing the entire valve will be the only solution.
If Multiple Zones Are Inactive
The problem could be with the transformer that supplies low voltage power to the controller. Use a multimeter to test wire terminals marked “24 VAC.” If the reading is below about 22 volts, you will need to replace the transformer.
Symptom: Leak Around Zone Valve
Leakage around a zone valve can be caused by several problems:
On valves where the anti-siphon device is built into the valve, the problem can be solved simply by tightening the screws that secure the cap to the valve body. Leakage can be caused by a torn or damaged diaphragm inside the valve. In this case, disassemble and reassemble the valve with a new diaphragm. A cracked valve body can cause leakage. In this circumstance, replace the entire valve.
Symptom: Leak In The Sprinkler Head Furthest From The Valve
When there is standing water or water leaking into the sprinkler furthest from the sprinkler sector valves, there are two possible causes:
- A dirty or damaged sprinkler that needs to be cleaned or replaced. Inspect the sprinkler head and correct any problems you find.
- A worn or damaged sector valve can also cause this symptom. It could be a sign that the valve is not closing completely. Disassemble, clean, and assemble the valve. If this does not solve the problem, the valve may need to be replaced.
A valve installed backwards can also cause this problem. Check valve to make sure flow direction is correct.
Read More: Irrigation And Drainage – Know The Main Types Of Irrigation Systems
With this information in hand, you can surely troubleshoot your irrigation system. In case you need an expert opinion, contact us at Done Right. At Done Right, we have a team of experienced professionals who provide irrigation and drainage solutions to people all around Florida, considering their custom requirements. If you, too, need some help, contact us right away.